Follow Me On Social Media!
Panoramic Easter Eggs: Easy and Colorful Treats to Delight!
Introduction to Panoramic Easter Eggs
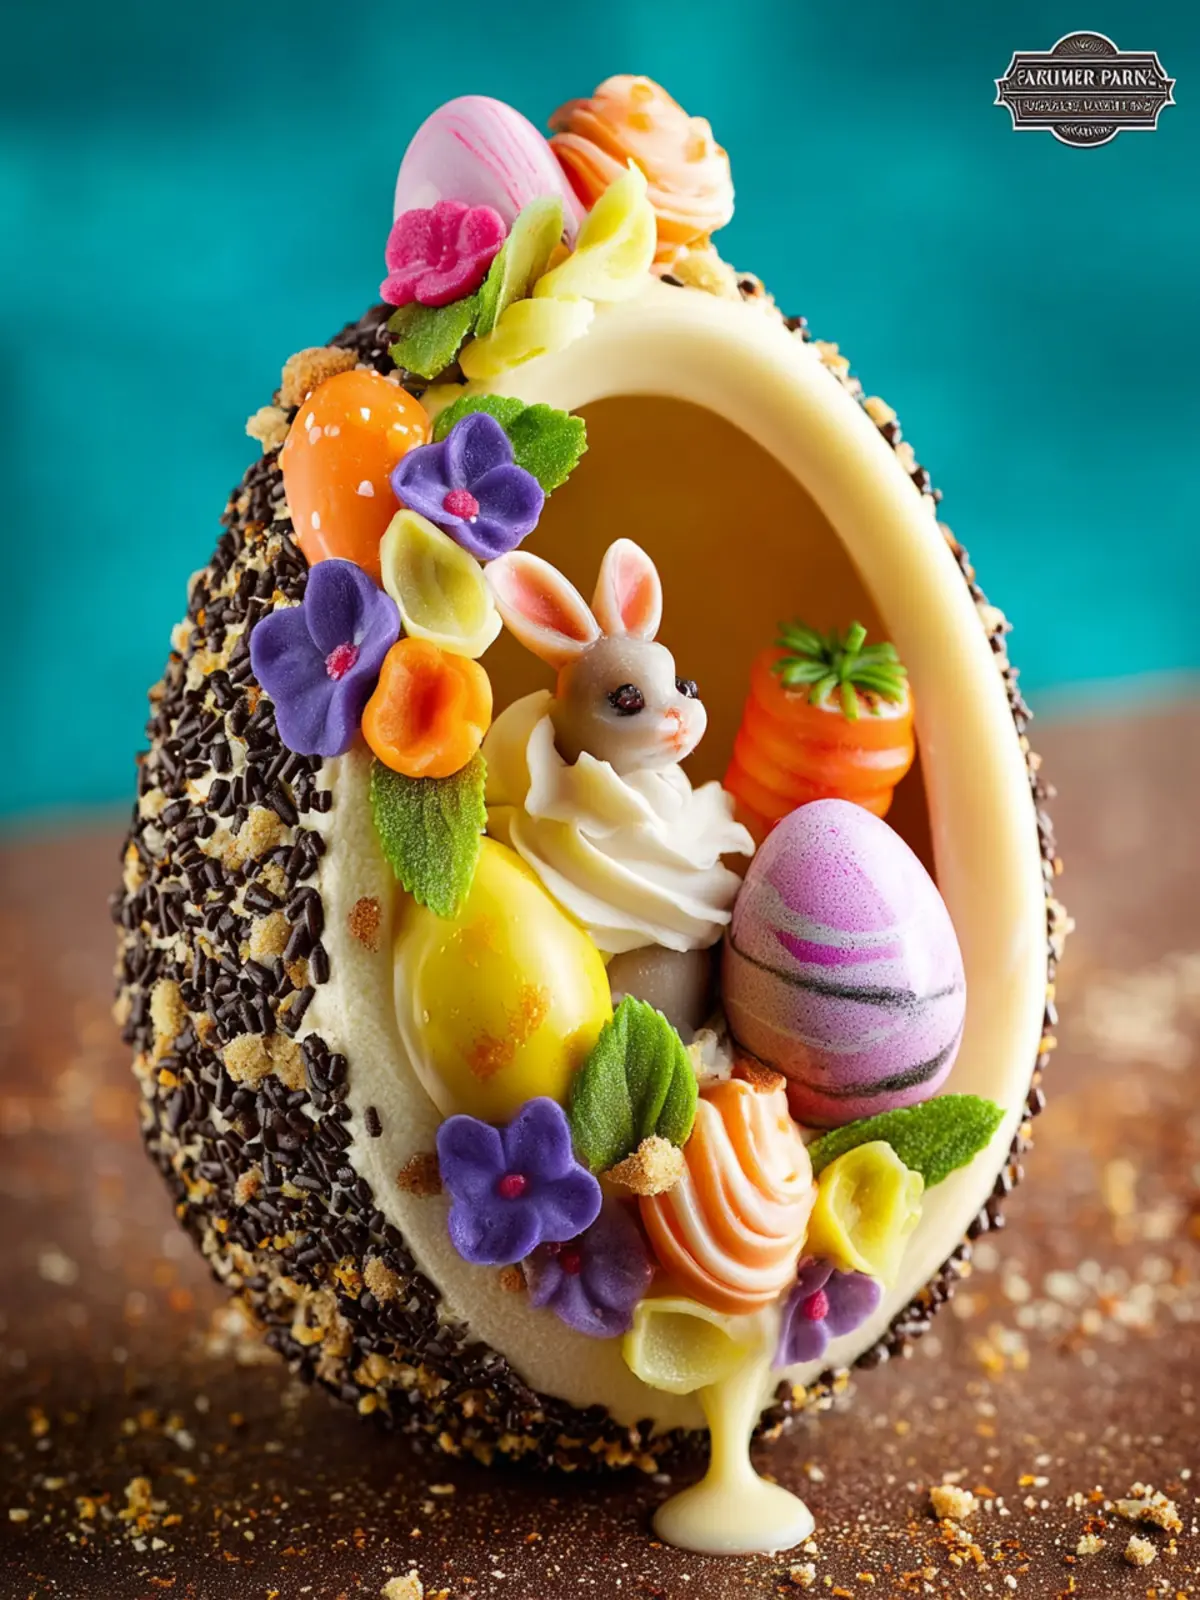
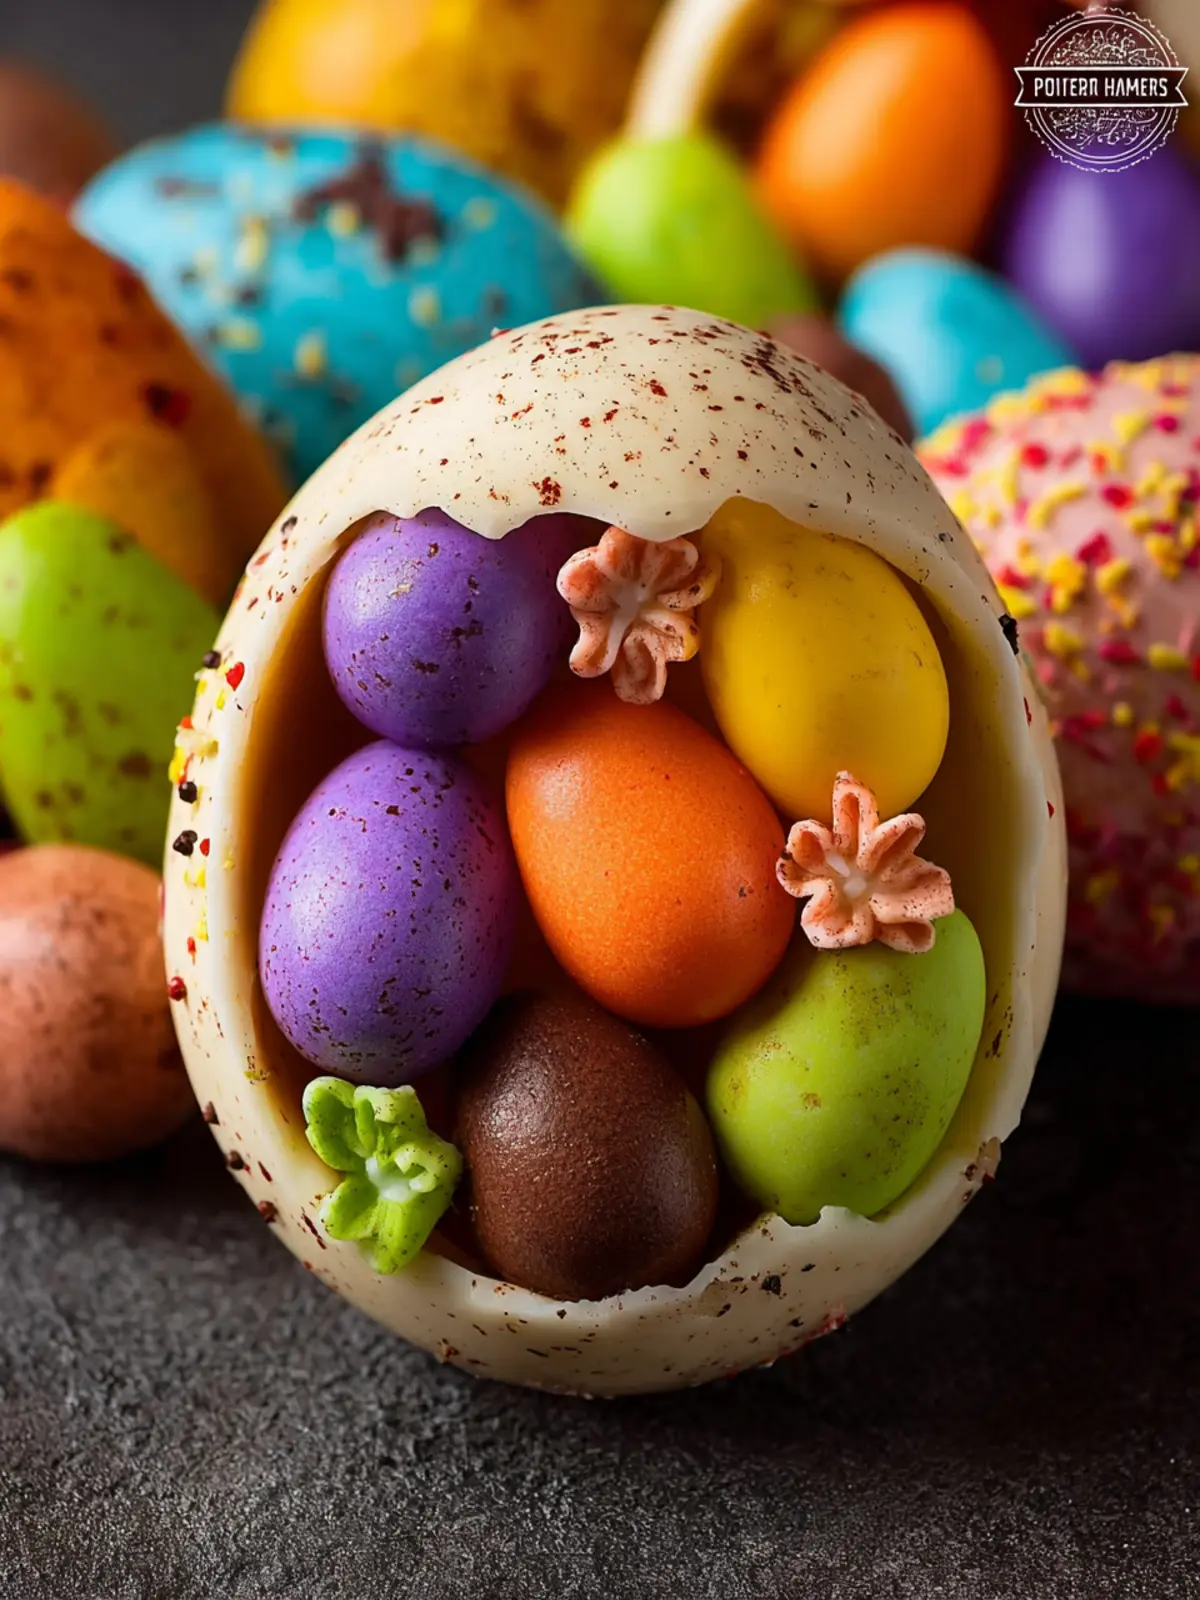
Imagine the excitement of Easter morning, with the sun filtering through the kitchen window, illuminating a stunning display of colorful Panoramic Easter Eggs. These delightful creations are more than just a sweet treat; they are edible art forms that blend the joy of the season with the creativity of intricate designs. Each egg is a mini world, crafted to surprise and enchant, inviting you on a flavorful adventure.
What makes Panoramic Easter Eggs so special?
These aren’t your ordinary Easter eggs—these are meticulously crafted confections that combine layers of flavors with beautiful, vibrant colors. The careful attention to detail and the sheer creativity involved in making them are what set these eggs apart. Each bite reveals a delightful surprise, be it a luscious filling or a distinct flavor that represents the spirit of spring.
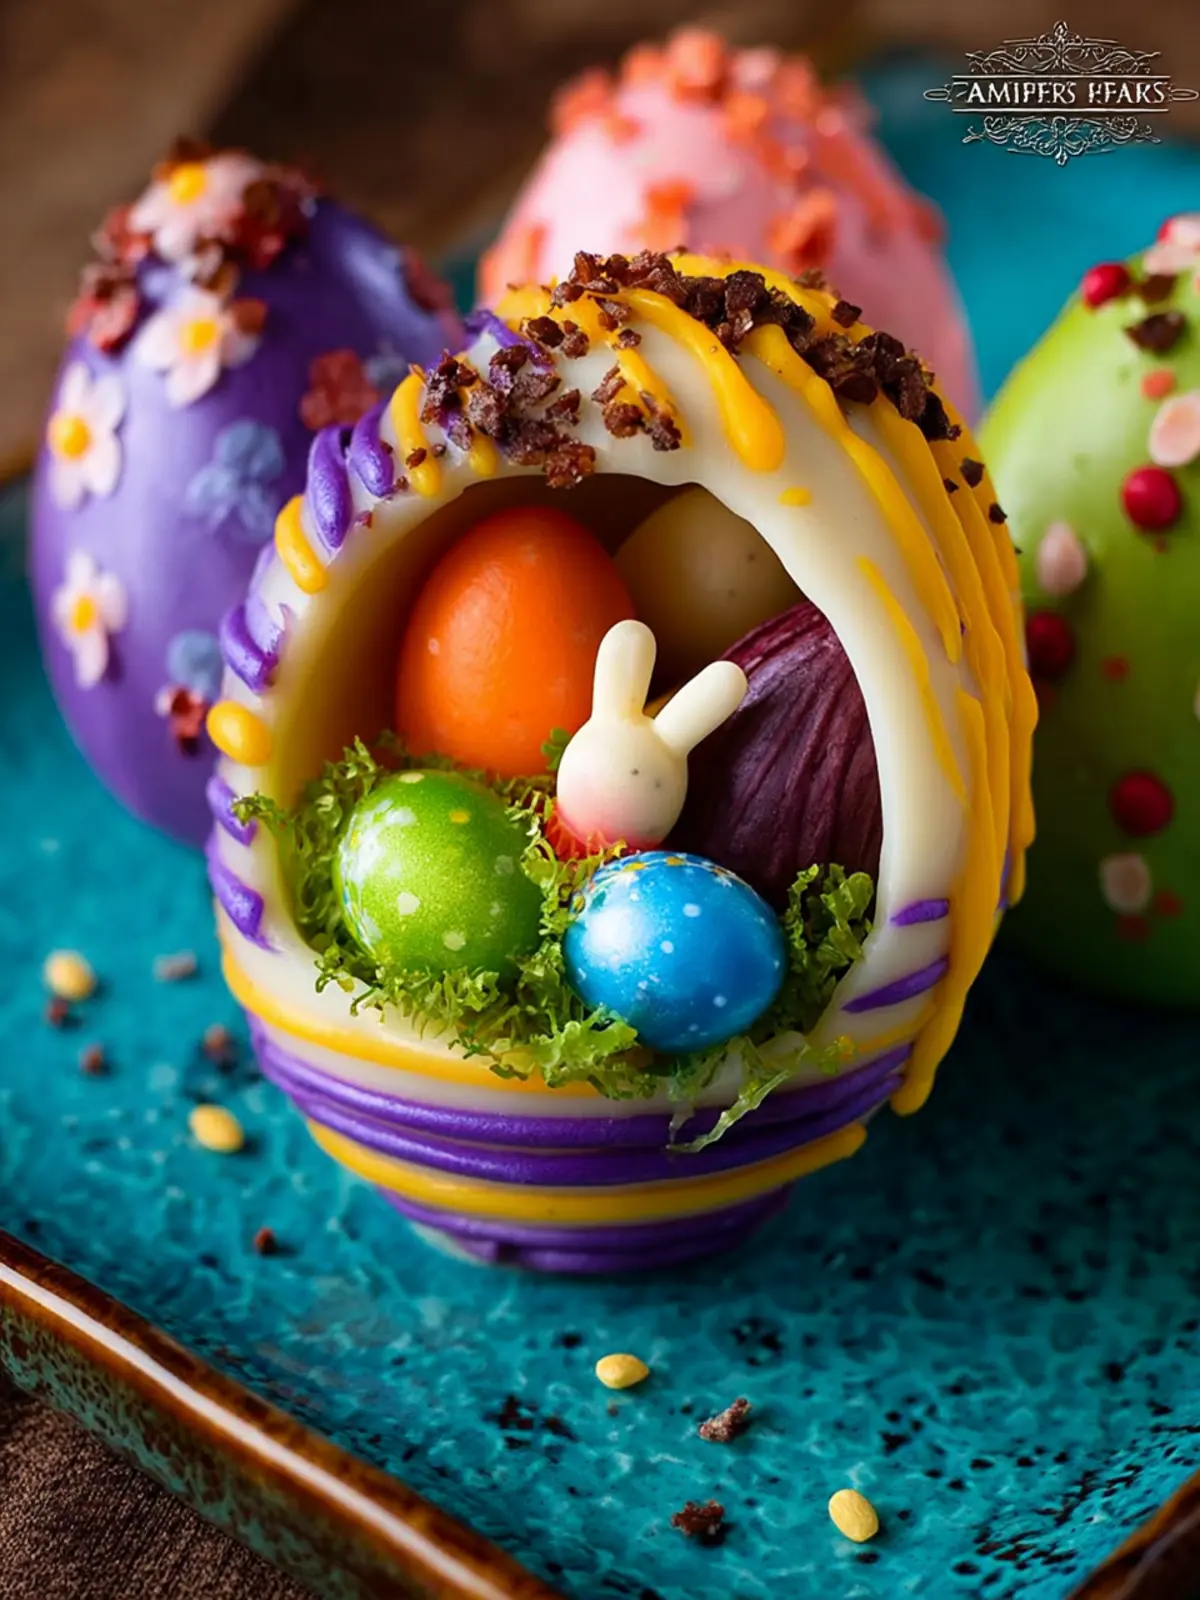
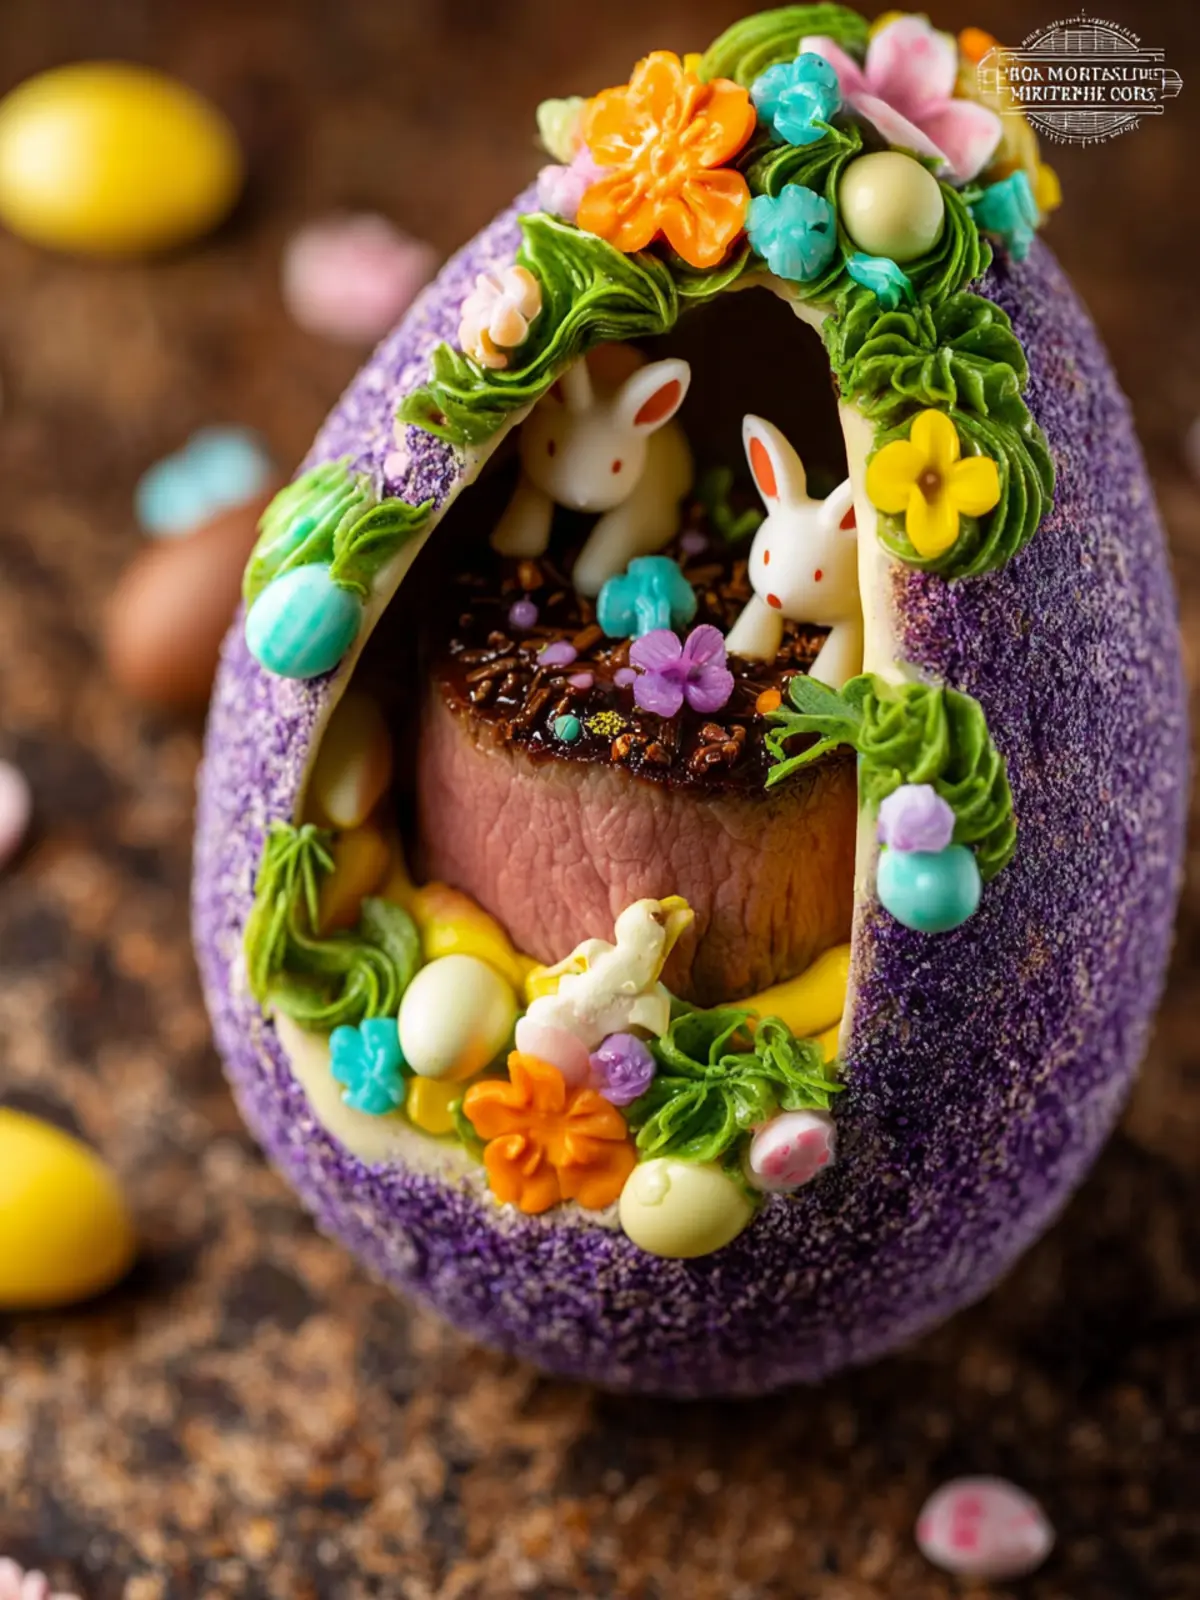
- Unique Presentation: Each egg can showcase an artistic design, from delicate floral patterns to whimsical scenes that capture the essence of Easter.
- Flavorful Surprises: Not only do these eggs look stunning, but they also hold a variety of fillings—from rich chocolate ganache to fruity jams, ensuring a delightful surprise with every bite.
- A Fun Activity: Kids and adults alike can join in on the fun of creating Panoramic Easter Eggs, turning it into a bonding experience that yields delicious results.
As you embark on your own journey to create these Easter delights, think about the story you want your eggs to tell. Will they reflect the colors of spring flowers? Or perhaps the warm tones of a sunny afternoon? The possibilities are endless, making this not just a recipe but a project that allows your imagination to flourish.
Join me as we dive deeper into the delicious and colorful world of Panoramic Easter Eggs, where every creation is a sweet celebration of creativity and love.
Key Ingredients for Panoramic Easter Eggs
Creating Panoramic Easter Eggs is both a delightful craft and a way to embrace the festive spirit. Let me share what makes this treat so special.
-
Chocolate: High-quality chocolate is crucial for a rich flavor and smooth texture. I prefer using semi-sweet chocolate for its perfect balance between sweetness and richness. If you want to experiment, dark chocolate can add a sophisticated touch.
-
Egg Mold: A good mold is key to achieving those stunning panoramic designs. Silicone molds work best because they allow for easy removal and flexibility in shaping.
-
Food Coloring: To bring your panoramic eggs to life, gel food coloring provides vibrant hues without thinning the chocolate. I often mix various colors to create a custom palette that captures the essence of spring.
-
Decorative Fillings: Think about fun textures and flavors! Mini candies, sprinkles, or even edible glitter can create exciting surprises inside each egg, making the reveal enjoyable for everyone.
-
Piping Bags: These are handy for adding details like icing flowers or writing. They help you express your creativity while decorating the outside of your Panoramic Easter Eggs.
Combining these ingredients will ensure your Easter eggs not only look beautiful but taste divine too!
Why You’ll Love Panoramic Easter Eggs
Creating Panoramic Easter Eggs is an experience that transcends mere candy-making; it’s a delightful journey that brings out your creative side while celebrating the spirit of Easter. Picture this: as you carefully craft these stunning eggs, you’re not just decorating; you are shaping memories with loved ones as they admire your artistic flair.
A Feast for the Eyes and Palate
One of the standout features of Panoramic Easter Eggs is their meticulous detail. Each egg is a miniature world, filled with vibrant colors and intricate designs that will leave everyone in awe. They’re not just visually captivating; the combination of flavors you choose for the fillings—like chocolate, fruit, or nut mixtures—creates an exciting surprise with every bite.
Perfect for All Skill Levels
Whether you’re an experienced chocolatier or a complete novice, making Panoramic Easter Eggs is a fun and approachable project. The steps are straightforward, allowing for plenty of room to experiment and make this recipe your own. Plus, what better way to bond with friends and family than by hosting an Easter egg decorating party?
Lasting Memories
As you gather around the table, the excitement builds, creating laughter-filled moments that will linger in your mind long after the last egg is devoured. Panoramic Easter Eggs aren’t just delicious treats; they’re a heartfelt tradition in the making, ready to be shared over Easter brunch or as charming gifts for loved ones. So go ahead, roll up those sleeves, and dive into the joy of making Panoramic Easter Eggs—your celebration is about to get a whole lot sweeter!
Variations on Panoramic Easter Eggs
Exploring Panoramic Easter Eggs can turn your holiday treat into a magnificent centerpiece. Whether you want something classic or a little adventurous, these variations will keep your Easter festivities vibrant and flavorful.
Different Fillings for a Unique Taste
-
Chocolate Ganache: Instead of the traditional frosting or cream, consider a rich chocolate ganache. It provides a luscious layer inside your panoramic egg, making every bite incredibly indulgent.
-
Fruit Compote: Add a refreshing twist by filling your eggs with a homemade fruit compote. Think tangy raspberries or sweet strawberries to create a contrast against the creamy chocolate.
-
Nut Butter Swirls: For a nutty surprise, swirl in your favorite nut butter. Almond or hazelnut butter not only brings in unique flavors but also elevates the texture.
Fun Decorative Options
-
Edible Glitter: Give your eggs a shimmering touch by sprinkling edible glitter on top of your chocolate coating. Not only does it look fabulous, but it also adds to the fun!
-
Sprinkles and Toasted Coconut: Want a more playful presentation? Coat the exterior of your eggs with colorful sprinkles or toasted coconut flakes. They not only enhance the visuals but also add a delightful crunch.
Alternative Chocolate Options
-
White Chocolate: If you’re not a fan of dark chocolate, try your hand at white chocolate. It creates a creamy and sweet base that pairs beautifully with tart fruit fillings.
-
Vegan Chocolate: For those maintaining a plant-based diet, vegan chocolate chips offer a delicious alternative without sacrificing flavor.
With these exciting variations, your Panoramic Easter Eggs can become a personal expression of creativity and taste! Whether you are sharing them with friends or saving them for yourself, these ideas will undoubtedly charm and delight.
Cooking Tips and Notes for Panoramic Easter Eggs
Creating Panoramic Easter Eggs is a delightful way to celebrate the holiday, but a few tips can elevate your experience. The joy of crafting these beautiful eggs lies not just in the design but also in the ingredients and techniques used.
Choose Quality Chocolate
The foundation of your eggs will be the chocolate. High-quality chocolate enhances the taste and texture, bringing a rich flavor to your creations. Consider using chocolate with a cocoa percentage of 60-70% for a perfect balance of sweetness and richness.
Tempering Chocolate Matters
Tempering your chocolate is crucial for a glossy finish and a satisfying snap. Melt the chocolate gently, then cool it to around 82°F before reheating slightly. This process ensures that your eggs maintain their shape and shine while being less prone to melting at room temperature.
Don’t Rush the Cooling Process
After shaping your Panoramic Easter Eggs, be patient! Let them cool completely before unmolding. This waiting time allows the chocolate to set properly, resulting in a sturdy shell that can hold a variety of fillings.
Fill with Delight
When it comes to the fillings, be as creative as you wish. Think about adding layers of ganache, fruit puree, or even nuts for texture. However, ensure that the filling complements the chocolate well; balancing flavors is key.
Decorate with Flair
Remember, the decoration is half the fun! Use edible glitter, colored sugar, or even small candies to enhance the visual appeal of your eggs. It’s a great way to personalize them and make them truly unique.
By keeping these tips in mind, your Panoramic Easter Eggs will surely impress both family and friends, turning your Easter celebrations into a sweet, memorable experience!
Serving Suggestions for Panoramic Easter Eggs
Creating Panoramic Easter Eggs is just the beginning; it’s the serving that truly brings your delightful creations to life. Imagine gathering friends and family around the table, sharing laughs and stories while marveling at the vibrant display of your Easter eggs.
Pair with Seasonal Treats
Complement your eggs with seasonal favorites such as:
- Fresh fruit platters: Strawberries and blueberries provide a refreshing balance to the sweetness of the eggs.
- Baked treats: Hot cross buns or cinnamon rolls are great choices to pair with the chocolatey indulgence.
Themed Presentations
Presentation matters! Consider:
- Easter baskets: Arrange your eggs in colorful baskets with shredded grass for a whimsical touch.
- Serving boards: Display them on a wooden charcuterie board, interspersed with nuts and dried fruits to enhance the visual appeal.
These Panoramic Easter Eggs aren’t just treats; they’re a centerpiece for joy and connection, making your Easter celebrations even more memorable with every bite.
Time Breakdown for Panoramic Easter Eggs
Creating Panoramic Easter Eggs is a delightful activity that brings a touch of art and nostalgia to your holiday celebrations. Understanding the time commitment will help you plan effectively and enjoy the process.
Preparation Time
Getting started requires about 30 minutes for gathering your materials and preparing the ingredients. This includes boiling the eggs and setting up your decorating station.
Setup and Drying Time
Once decorated, allow your Panoramic Easter Eggs ample time to dry. This typically takes around 2-3 hours, depending on the type of paint and medium used.
Total Time
In total, you can expect to spend around 3-4 hours on creating your beautiful Panoramic Easter Eggs. Planning your day around this timeline ensures a stress-free experience and adds to the joy of the holiday festivities.
Nutritional Facts for Panoramic Easter Eggs
Creating Panoramic Easter Eggs isn’t just a delightful way to celebrate the holiday; it’s also essential to understand their nutritional profile. These beautifully crafted treats are not only a feast for the eyes but also a treat for the taste buds.
Calories
A single Panoramic Easter Egg can contain approximately 200-250 calories, depending on the fillings and decorative elements used. Knowing how many calories you’re indulging in can help you enjoy these treats mindfully.
Sugar Content
These vibrant creations can pack in about 15-20 grams of sugar each. While they are a sweet indulgence, remember that moderation is key to enjoying festive treats without overdoing it.
Allergens
It’s crucial to be aware of potential allergens in Panoramic Easter Eggs. Ingredients like chocolate, nuts, and dairy can trigger allergies for some individuals, so always check your specific recipe’s components and keep labels handy if you’re serving to guests.
By understanding the nutritional aspects of your Panoramic Easter Eggs, you can create with both delight and consideration for health.
FAQs about Panoramic Easter Eggs
When creating your Panoramic Easter Eggs, you might have some questions about preparation and versatility. Let’s dive into some common FAQs to help you master this fun and creative project.
Can I make these eggs ahead of time?
Absolutely! One of the best things about Panoramic Easter Eggs is that they can be made a few days in advance. After you shape and decorate your sugar eggs, store them in an airtight container at room temperature, away from direct sunlight. This will ensure your creations stay fresh and vibrant. Just make sure the decorations are completely dry before sealing them away. Planning ahead will also give you peace of mind as Easter approaches!
What other decorations can I use?
The sky’s the limit when it comes to decorating your Panoramic Easter Eggs. Beyond traditional icing and edible glitter, consider using:
- Edible flowers for a natural touch
- Colored sugar for a sparkly finish
- Fondant cutouts to create unique scenes
- Small figurines that can tell a story
Feel free to let your creativity flow and make each egg a one-of-a-kind masterpiece.
Can I eat the sugar eggs after decorating?
Yes, you can enjoy your Panoramic Easter Eggs! The sugar eggs are primarily decorative, but they are made from edible ingredients, meaning you can savor them once they’re completed. Just keep in mind that the decorations might vary in taste—some might be sweeter than others. If you’re planning to eat them, ensure that all decorations used are food-safe and edible.
These tips should help you enjoy the process of making your Panoramic Easter Eggs even more! Happy crafting!
Conclusion on Panoramic Easter Eggs
Creating Panoramic Easter Eggs is more than just a fun activity; it’s a memorable way to celebrate the season with loved ones. These beautifully designed treats will surely impress, blending creativity with delicious flavors. Remember that your choices of fillings—be it chocolate, fruit slices, or nut butters—can elevate your experience. Plus, the combination of vibrant colors and intricate designs makes every egg a unique artwork. As you wrap up your Easter festivities, consider making these eggs a delightful tradition, inviting family and friends to join in the fun, laughter, and, of course, indulgent tasting. Happy crafting!
Print
Easter Sugar Eggs
- Total Time: 7 hours 45 minutes
- Yield: 2 egg halves 1x
- Diet: None
Description
Delightful sugar eggs decorated for Easter, perfect for creating festive scenes.
Ingredients
Scale
- 1 egg white
- 3 1/2 cups granulated sugar
- 1/2 cup powdered sugar
- food coloring (optional)
- royal frosting
- jelly beans
- tiny Easter figurines and decorations
Instructions
- Whisk the egg white until it becomes kind of foamy.
- In a separate bowl, mix together the granulated and powdered sugars so they’re mixed well.
- Pour the egg white into the sugars and begin stirring. At first it will seem like it won’t get wet enough, but keep stirring until it becomes like damp beach sand.
- Once your sugar mixture is ready, start filling your egg mold. With each scoop, pack down firmly. You want the egg to be smooth, so press down on the sugar to prevent any small gaps or cracks from forming. If you have excess sugar and want to make more eggs, keep it in a bowl and place a damp paper towel directly over the sugar to prevent it from drying out.
- Place a stiff piece of cardboard directly on the top of the mold. Bracing one hand on the cardboard and the other underneath the mold, quickly flip it upside-down so that the egg halves are now resting on the cardboard. Quickly remove the mold—now you should have two perfect sugar egg halves.
- At this point, the egg halves need to dry out a little before you can use them. You can let them sit at room temperature for about 6-7 hours, or you can put them in a 200-degree oven for 15-30 minutes (depending on the humidity and elevation where you live).
- Once the eggs have started to set, they need to be hollowed out. It is important to do this when the outside is hard, but the insides are still soft.
- Pick up the egg half, hold it in the palm of one hand and use a spoon to scrape out the moist sugar. Continue to scrape the interior of the egg until you have a sugar shell that is about 1/2-inch thick. You want it to be as thin as possible, while still being sturdy enough to hold together out the interior of the other egg half.
- CAREFULLY use a serrated knife to slice off the tip of each egg; this will be the hole you look through to see the panorama, so make it about the size you would like. Be careful not to apply too much pressure and cause the egg to collapse or crack.
- Continue to gently whittle/sand away the front of the egg until the two halves match. At this point, the eggs need to dry out further before they can be completed. I would recommend letting them dry out overnight.
- Once the egg halves are dry and very hard, you can decorate the inside with a beautiful Easter scene. Pipe a small amount of royal icing into the bottom portion of the egg half. This is to anchor everything else you add.
- Add a layer of green-tinted coconut or Easter grass, if desired, and press gently to adhere it to the frosting. Add little figurines, pictures, buttons, small candies, or sugar decorations. It is easiest to add a dab of royal icing to the back or bottom of your decorations to help them stick.
- Now it is time to glue the two halves of the egg together. Pipe a thin line of royal icing (or you can use a hot glue gun) around the lip of the bottom half of the egg. Press the top half down onto the bottom, making sure that they line up evenly.
- Run your finger around the seam where the eggs meet to remove any excess frosting. You want to do this right away so that it will not begin to harden into unsightly shapes.
- Allow the egg to sit for about 30 minutes, until the frosting has hardened enough to move the egg without damaging it.
- Time to put the finishing touches on your egg! Pipe a decorative border around the seams where the two egg halves were joined together. Also pipe a border around the opening of the window, to better frame the scene inside and to hide any uneven edges.
- If you have frosting flowers or other decorations for the outside of the egg, now is the time to put them on. Use a small dab of royal frosting to secure them to the egg. Decorate to your desire with any additional frosting.
Notes
- Ensure to keep the sugar mixture moist while working with it.
- Decorating can be as creative as you like; use favorite colors and designs.
- Store completed eggs in a cool, dry place to prevent them from becoming sticky.
- Prep Time: 15 minutes
- Cook Time: 30 minutes
- Category: Dessert
- Method: Baking
- Cuisine: American
Nutrition
- Serving Size: 1 egg half
- Calories: 120
- Sugar: 25g
- Sodium: 0mg
- Fat: 0g
- Saturated Fat: 0g
- Unsaturated Fat: 0g
- Trans Fat: 0g
- Carbohydrates: 30g
- Fiber: 0g
- Protein: 1g
- Cholesterol: 0mg